前提条件
-
1.域名所有权: 您必须拥有要为其获取 TLS 证书的域名或子域的所有权。
-
2.Cloudflare 帐户: 创建一个 Cloudflare 帐户并将您的域名添加到其管理中。
-
3.服务器访问: 您需要访问要安装 Certbot 的服务器。
一、安装certbot及dns插件
使用Let’s Encrypt推荐的snap安装certbot,具体可以见我上一篇文章,这里不赘述了。
1.安装certbot
sudo snap install --classic certbot
2.确保certbot 的安装级别
在机器的命令行上运行该命令,确保certboot安装时候 使用了–classic参数,以具有使用root的权限。
sudo snap set certbot trust-plugin-with-root=ok
3.安装certbot-dns-cloudflare插件
如果你使用其他厂商管理域名,可以到这里查看其他dns插件
sudo snap install certbot-dns-cloudflare
二、创建cloudflare 令牌
软件安装完成后,接下来需要使用 Cloudflare API 令牌设置一个凭证文件,以允许 Certbot 与您的 Cloudflare 帐户一起运行。
1.访问 Cloudflare 仪表板
登录您的 Cloudflare 帐户并导航到“API 令牌”部分。
2.创建 API 令牌
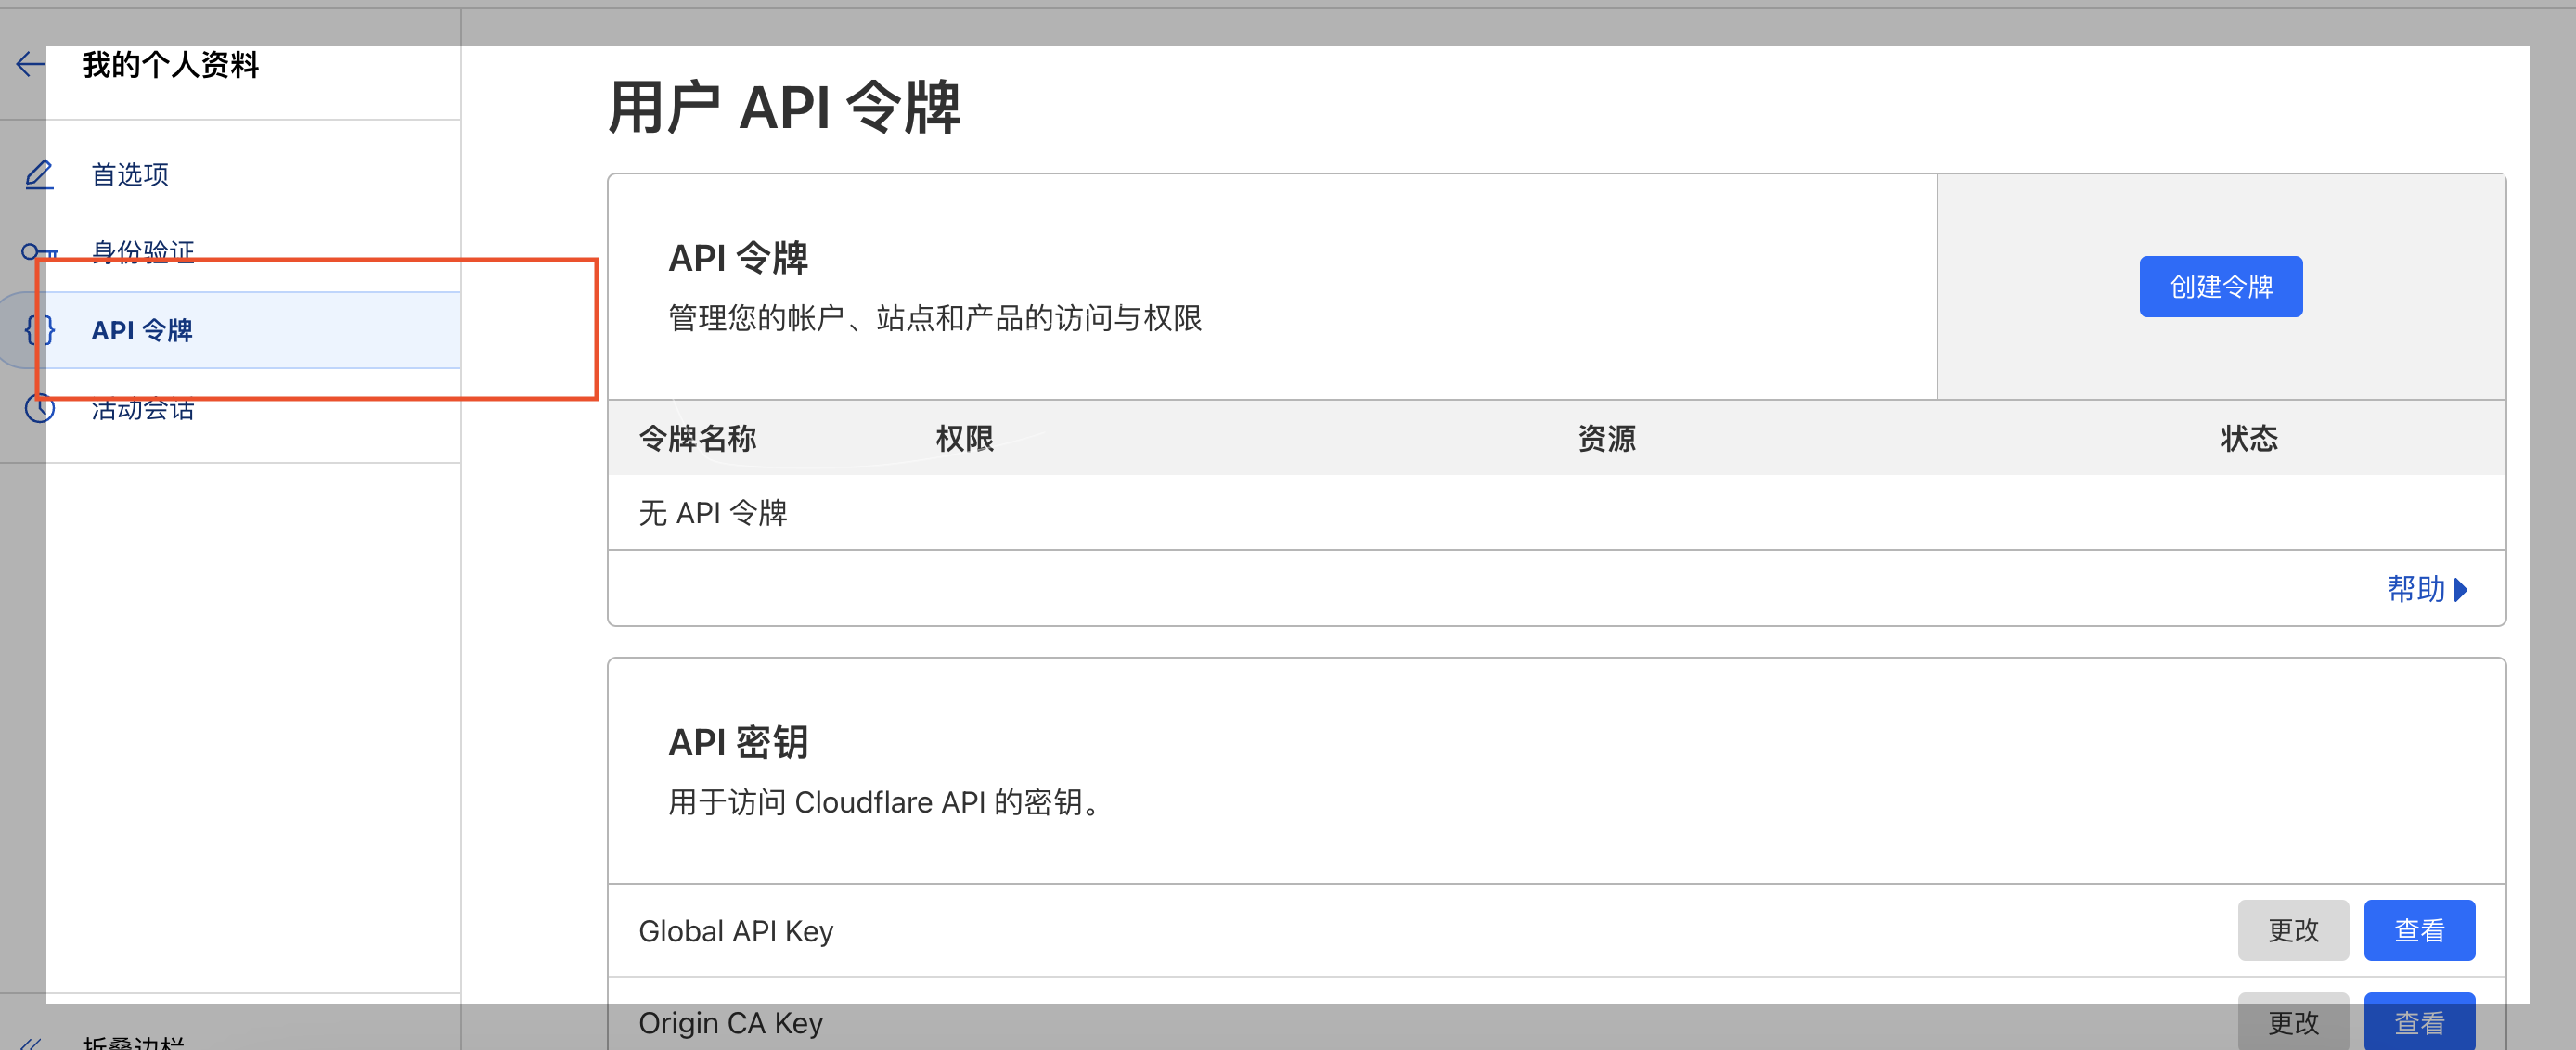
要创建您的 API 令牌,请从您的个人资料页面开始,单击左侧的“API 令牌” 。
在api选项中,点击“创建令牌”
 在以前Cloudflare 必须使用“全局 API 密钥”用于身份验证,但此密钥可以访问您帐户中所有域的整个 Cloudflare API,这意味着如果泄露可能会造成很大的损失。在最新的Cloudflare 的API 中 令牌可以限制到特定的域和操作,因此现在是推荐的身份验证选项。
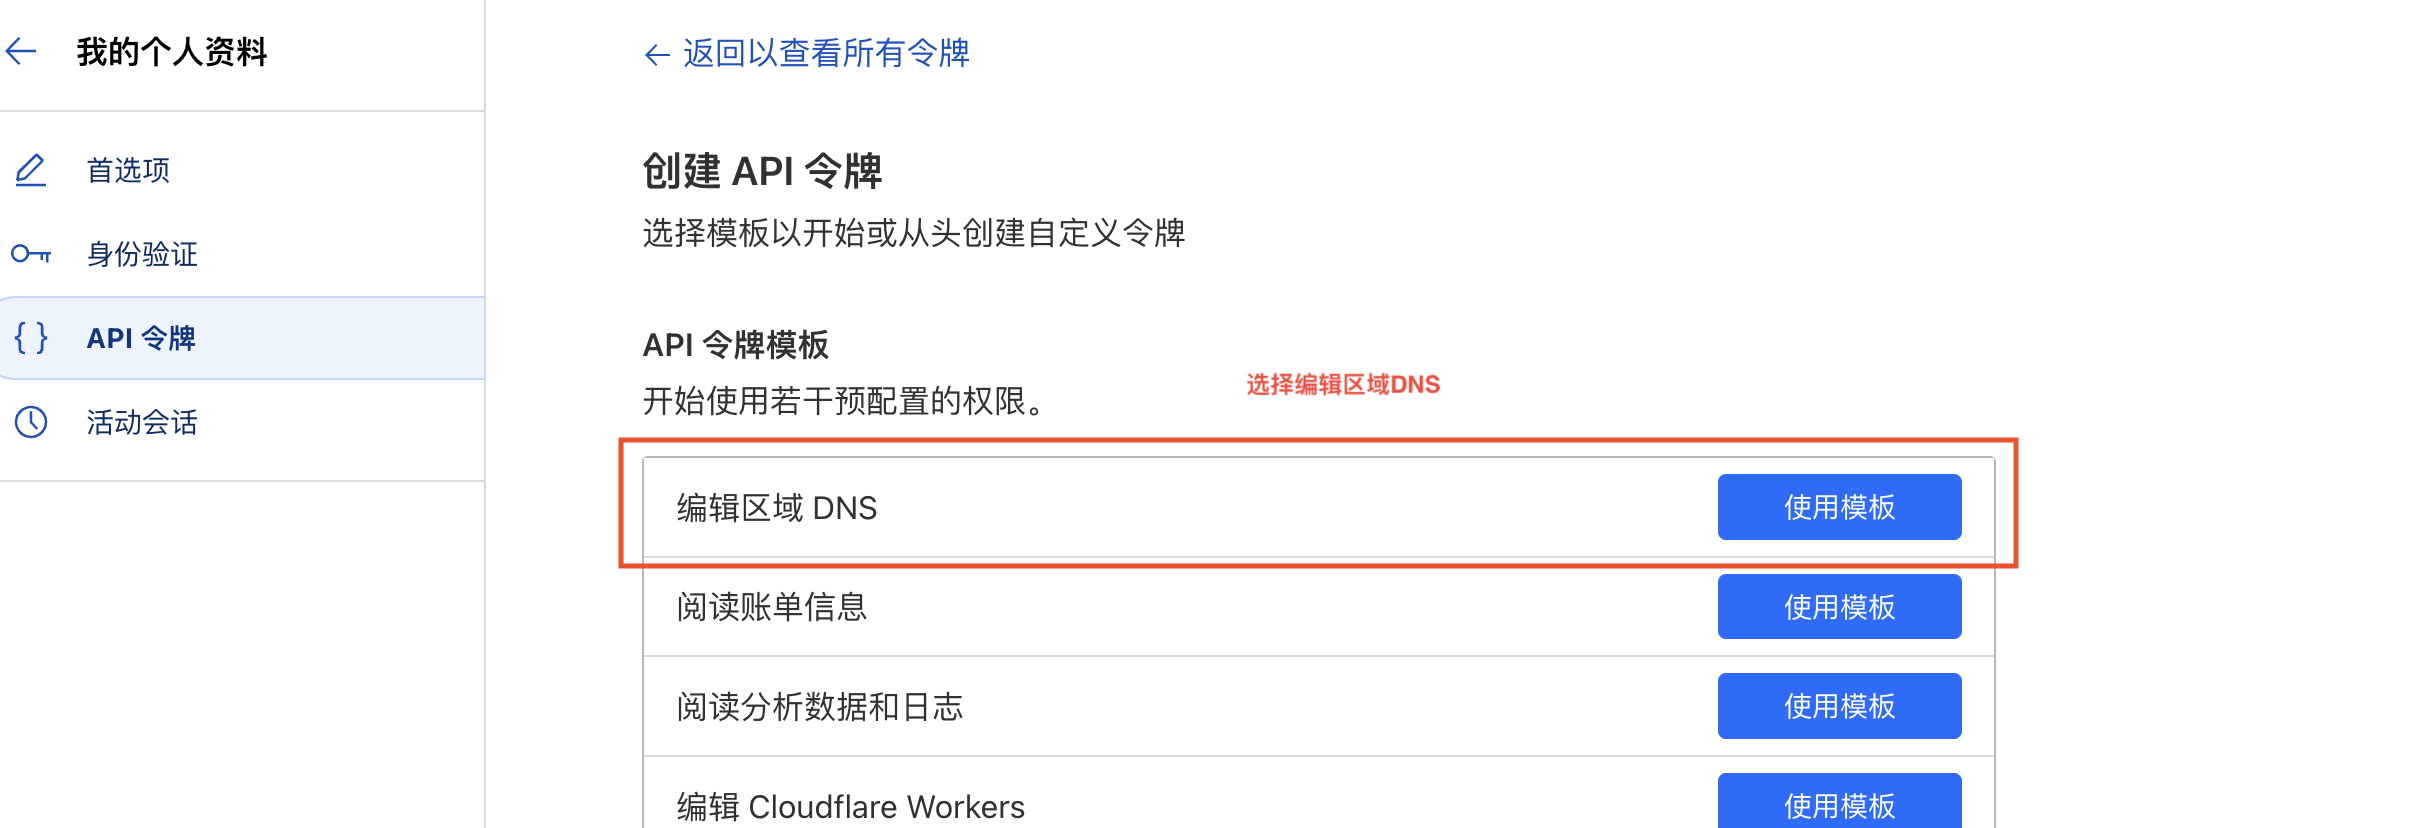
按照操作下一步,第一个红色方框内如图填写,第二个第三个方框你可以限制特定你账户绑定的域名或者客户端ip地址
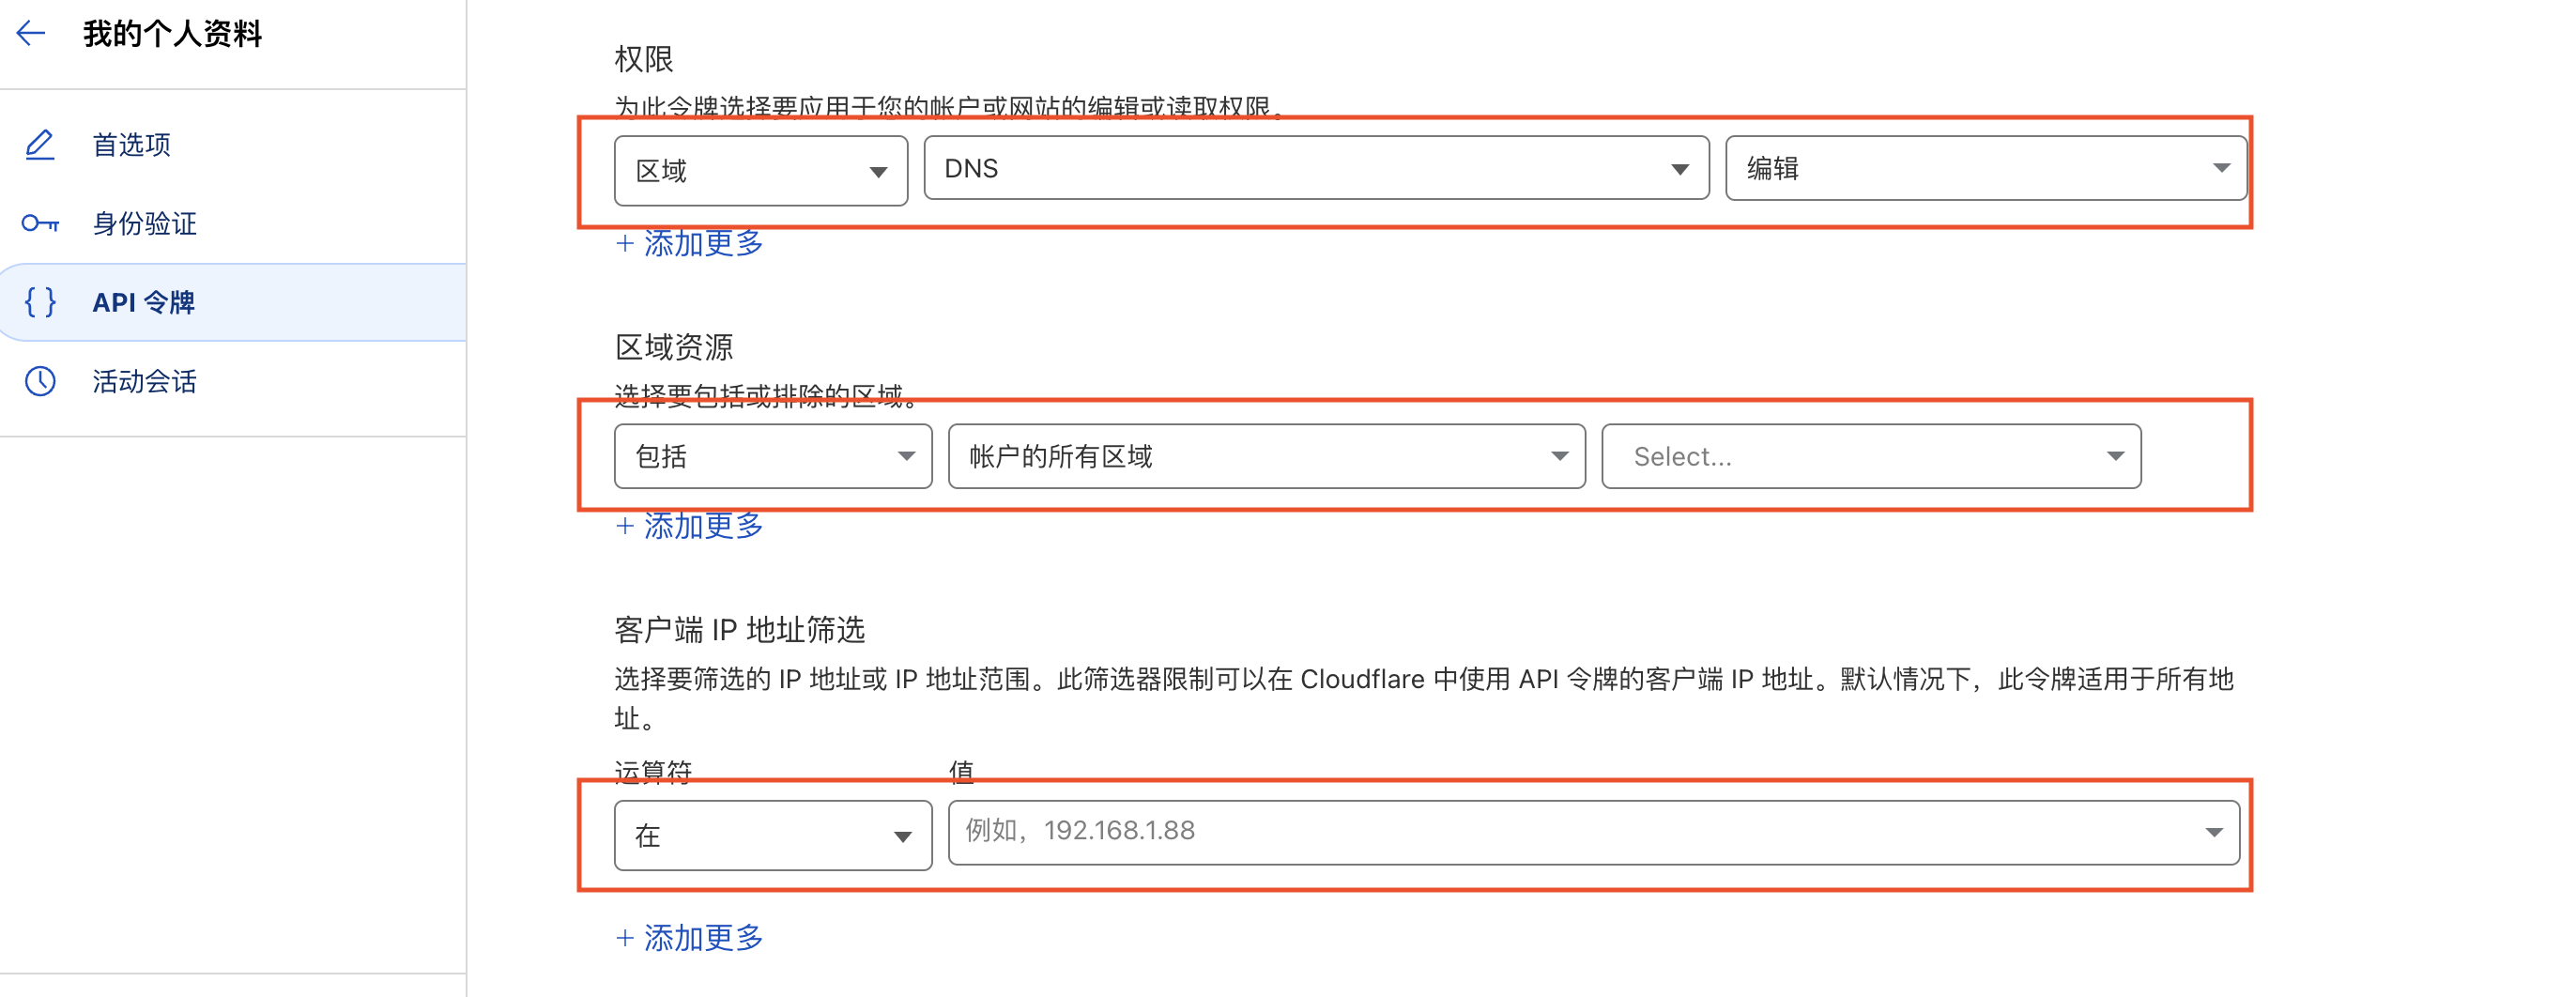
你也可以限定api 令牌生效时间,然后选择下一步
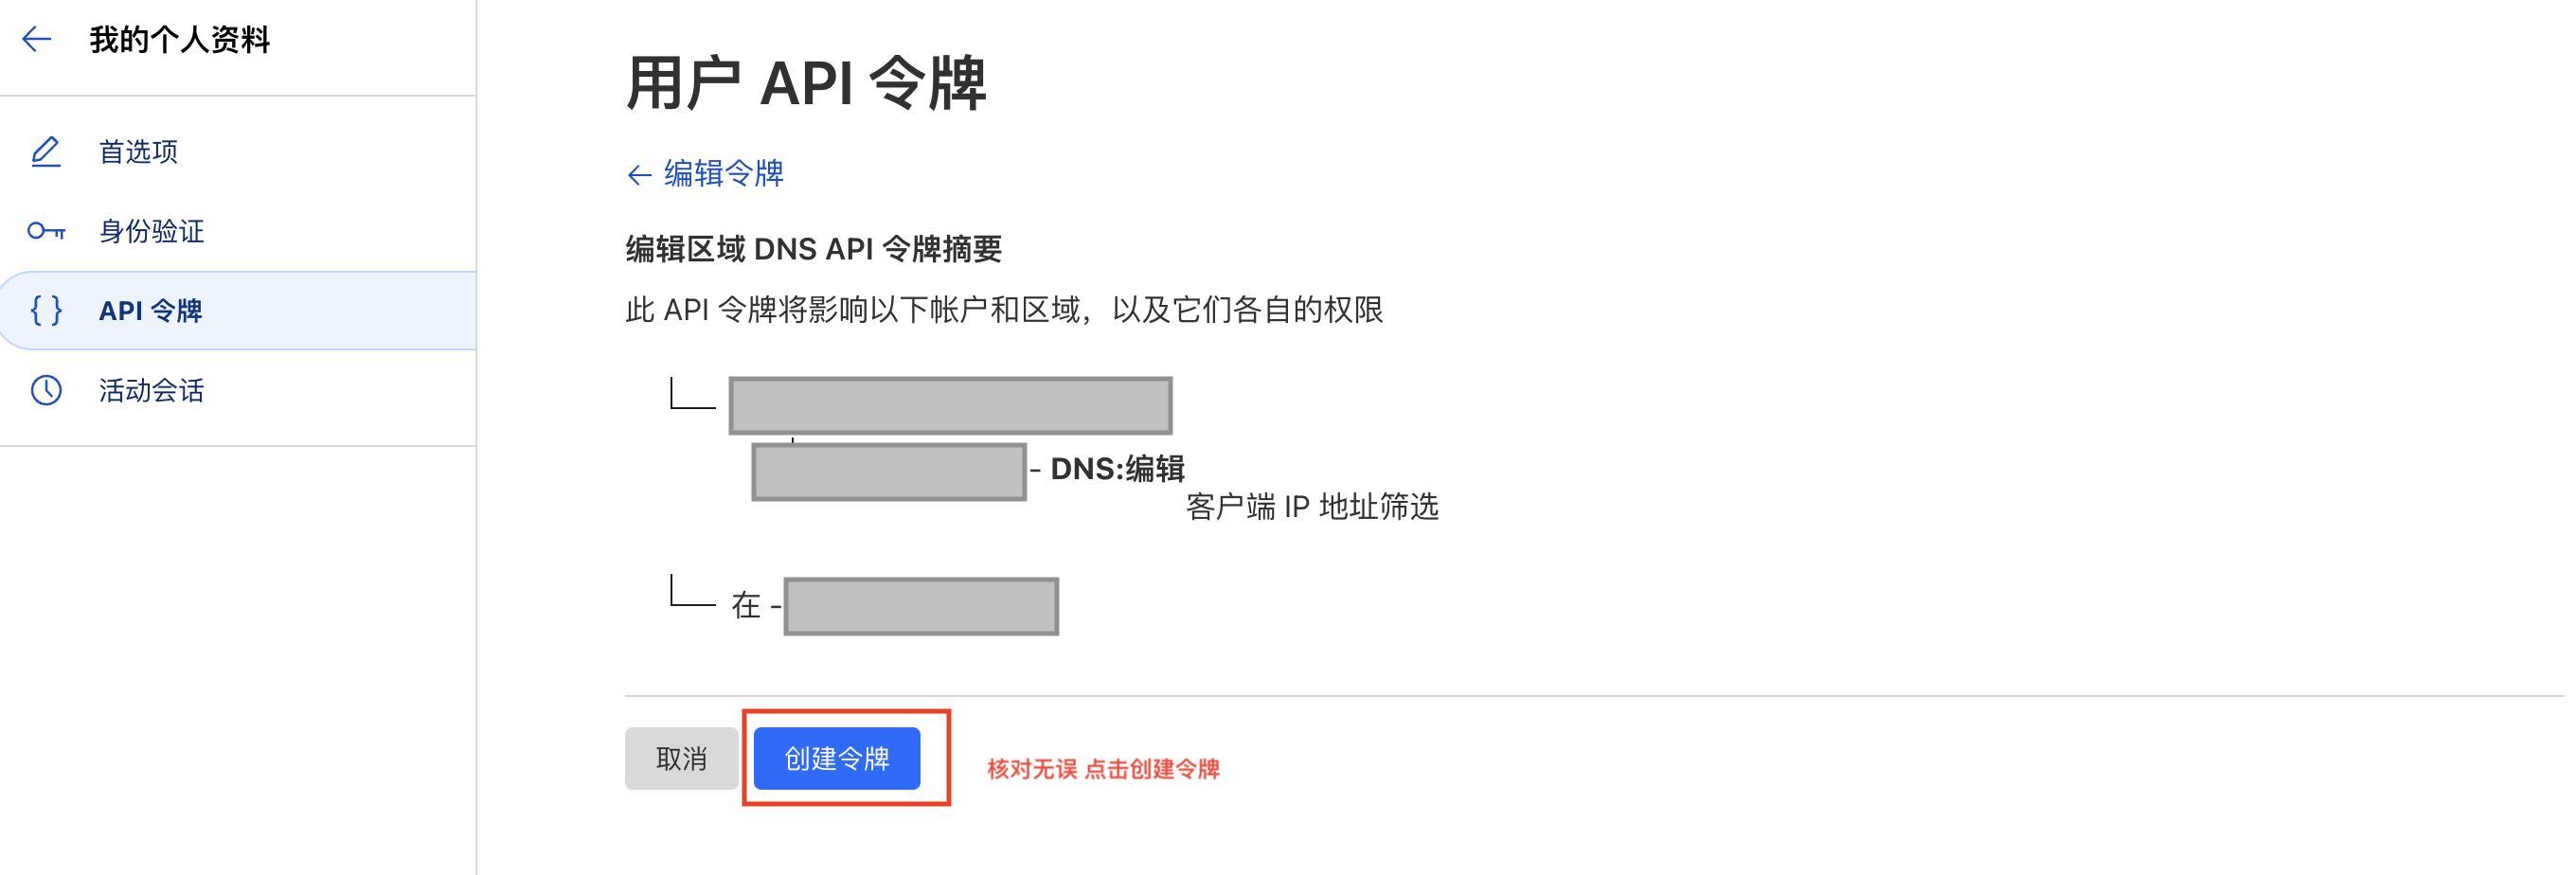
检查无误后,点击创建令牌。如果正常的话,您的 API 令牌已创建。
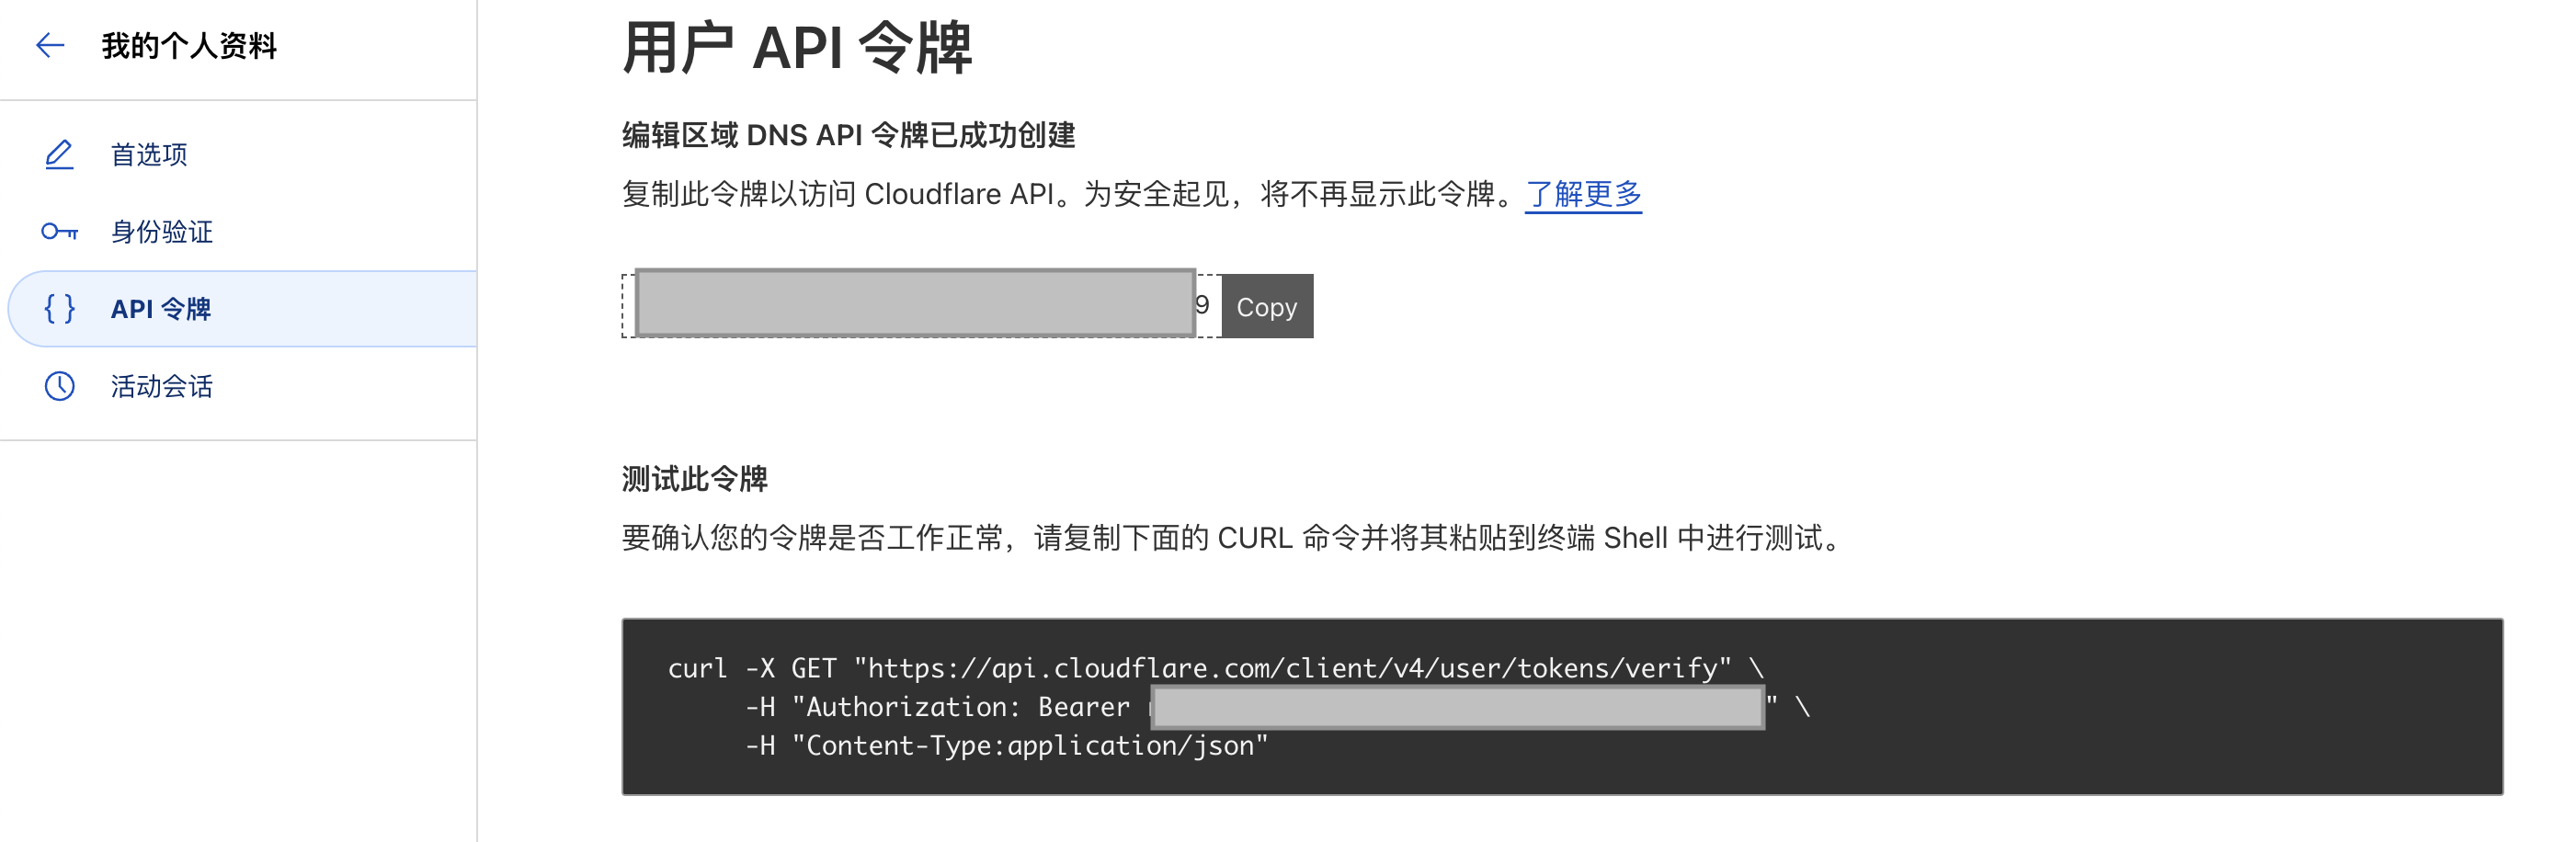
复制令牌到你的本地文件中。不要在未复制令牌的情况下关闭此页面,因为如果您丢失了令牌,Cloudflare 将不会再次向您显示它。如果发生这种情况,您需要删除令牌并创建一个新令牌。
三、创建您的凭证文件
在您的服务器上,我们将创建一个目录来存储您的 Certbot 凭证文件和您的 Cloudflare API 令牌。
sudo mkdir -p ~/.secrets/certbot/ && touch ~/.secrets/certbot/cloudflare.ini
vi编辑cloudflare.ini文件, 添加您刚才获取的cloudflare 令牌
# Cloudflare API token used by Certbot
dns_cloudflare_api_token = 0123456789abcdef0123456789abcdef01234567
Certbot 如果检测到系统上的其他用户可以访问凭证文件,它将发出警告。警告内容为“凭证配置文件的权限不安全”,后跟凭证文件的路径, 您可以通过修改文件权限解决。
sudo chmod 600 ~/.secrets/certbot/cloudflare.ini
四、获取证书
要生成证书,您需要从服务器的终端执行此命令(以example.com 域名为例)
certbot certonly \
  --dns-cloudflare \
  --dns-cloudflare-credentials ~/.secrets/certbot/cloudflare.ini \
  -d example.com \
  -d *.example.com
在这里,我们指定 Certbot 需要与 Cloudflare 通信以及从何处获取我们创建的凭证文件。最后,我们指定要创建证书的域。
在请求证书时,Certbot 会在您第一次运行时提示您输入一些信息,例如您的电子邮件地址,然后接受服务条款,最后是否愿意注册 EFF 的电子邮件列表。申请成功类似这样的的页面
Saving debug log to /var/log/letsencrypt/letsencrypt.log
Enter email address (used for urgent renewal and security notices)
 (Enter 'c' to cancel): [email protected]

- - - - - - - - - - - - - - - - - - - - - - - - - - - - - - - - - - - - - - - -
Please read the Terms of Service at
https://letsencrypt.org/documents/LE-SA-v1.3-September-21-2022.pdf. You must
agree in order to register with the ACME server. Do you agree?
- - - - - - - - - - - - - - - - - - - - - - - - - - - - - - - - - - - - - - - -
(Y)es/(N)o: y

- - - - - - - - - - - - - - - - - - - - - - - - - - - - - - - - - - - - - - - -
Would you be willing, once your first certificate is successfully issued, to
share your email address with the Electronic Frontier Foundation, a founding
partner of the Let's Encrypt project and the non-profit organization that
develops Certbot? We'd like to send you email about our work encrypting the web,
EFF news, campaigns, and ways to support digital freedom.
- - - - - - - - - - - - - - - - - - - - - - - - - - - - - - - - - - - - - - - -
(Y)es/(N)o: y
Account registered.
Requesting a certificate for example.com and *.example.com
Waiting 30 seconds for DNS changes to propagate

Successfully received certificate.
Certificate is saved at: /etc/letsencrypt/live/example.com/fullchain.pem
Key is saved at:         /etc/letsencrypt/live/example.com/privkey.pem
This certificate expires on 2024-09-15.
These files will be updated when the certificate renews.

NEXT STEPS:
- The certificate will need to be renewed before it expires. Certbot can automatically renew the certificate in the background, but you may need to take steps to enable that functionality. See https://certbot.org/renewal-setup for instructions.
We were unable to subscribe you the EFF mailing list because your e-mail address appears to be invalid. You can try again later by visiting https://act.eff.org.

- - - - - - - - - - - - - - - - - - - - - - - - - - - - - - - - - - - - - - - -
If you like Certbot, please consider supporting our work by:
 * Donating to ISRG / Let's Encrypt:   https://letsencrypt.org/donate
 * Donating to EFF:                    https://eff.org/donate-le
- - - - - - - - - - - - - - - - - - - - - - - - - - - - - - - - - - - - - - - -
其他和普通使用单域名一样.
五、测试更新
您可以运行此命令测试证书的自动更新你可以使用测试是否自动更新.
sudo certbot renew --dry-run
六、配置证书
现在你可以配置的的子域名来使用tsl安全证书了,下面是一个简略的配置,你需要根据您自己的需求完善。
listen 443 ssl;
ssl_certificate /etc/letsencrypt/live/example.com/fullchain.pem;
ssl_certificate_key /etc/letsencrypt/live/example.com/privkey.pem;
include /etc/letsencrypt/options-ssl-nginx.conf;
七、 结论
通过上述步骤,您应该能够成功配置您的子域名使用TLS安全证书。
希望本指南对您有所帮助!
关注我获取更多资讯